-
What I Cooked This Weekend #3
In the last couple of weeks, I discovered two awesome cooking channels and an amazing book I didn’t know about before:
- ThatDudeCanCook
- What’s Eating Dan? This is part of the America’s Test Kitchen channel, but I think it really stands out from the rest of the content they have. It should be its own channel!
- Vegatables Illustrated: An Inspiring Guide with 700+ Kitchen-Tested Recipes: America’s Test Kitchen. I am obsessing with this book, it has tons of simple, classic, and delicious vegetable recipes, and it’s very well organized and put together.
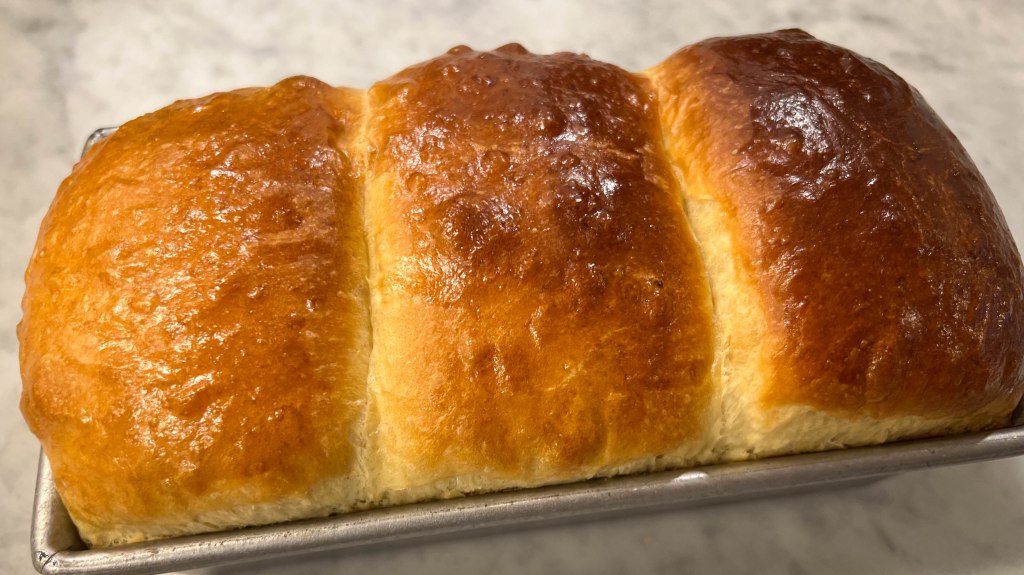
This weekend I made two loaves of brioche with this recipe. Turned out amazing. I used one loaf to make french toast the next morning.
I also found that rabbit was available at a local grocery store and picked one up, and cooked it with garlic, parsley, olive oil, and white wine, using this classic Spanish recipe. To make it ultra-moist, I brined it for 45 minutes in 4 gallons of water, 1 cup of salt, and 1 cup of sugar. This is a brine I learned many years ago for chicken that is a game changer.

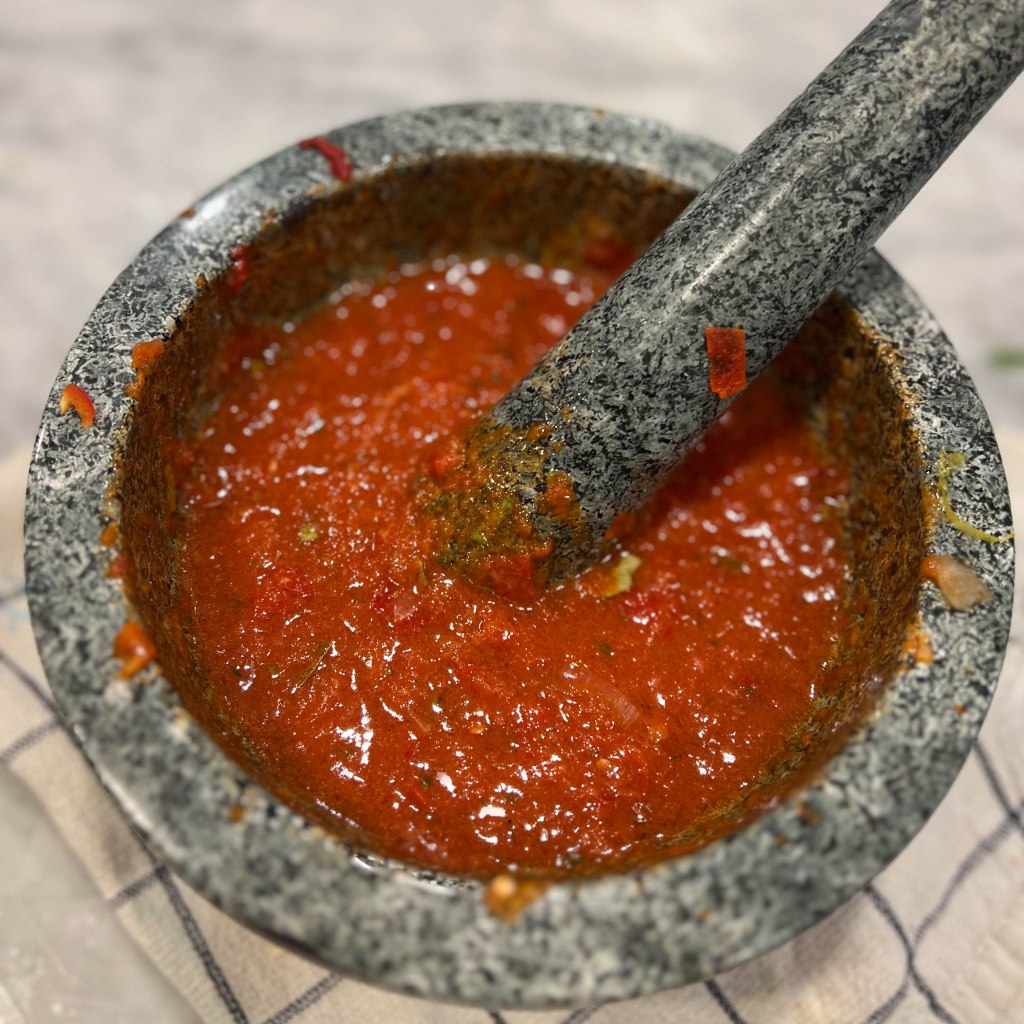
I also made peri peri marinade, and I’ve had a chicken taking a bath in that stuff for 24 hours already. I will cook it today.
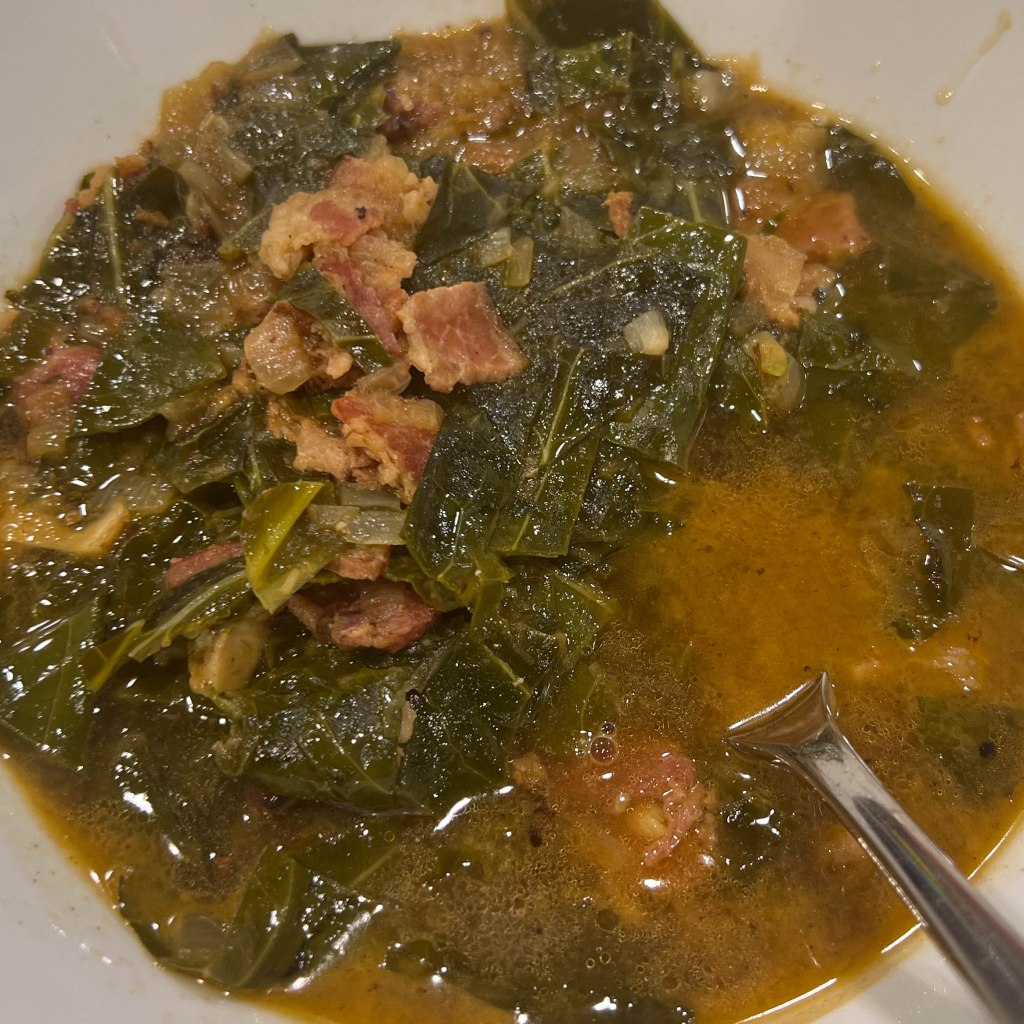
Finally, from the Vegetables Illustrated book, I made southern style collard greens which were incredible. Last week I also made the broccoli rabe recipe with garlic, bacon, parmesan, and balsamic vinegar and it was also insanely good. This book is the best.
-
What I Cooked this Weekend #2
This weekend I got my copy of the Cook’s Illustrated Vegetables cookbook. It looks awesome and I am going to be trying many recipes from it. I started making the veggie burger, which has bulgur, pinto beans, beets, basil, mustard, and a bunch of other good stuff. I didn’t have bulgur so I substituted with farro which was quite good too.
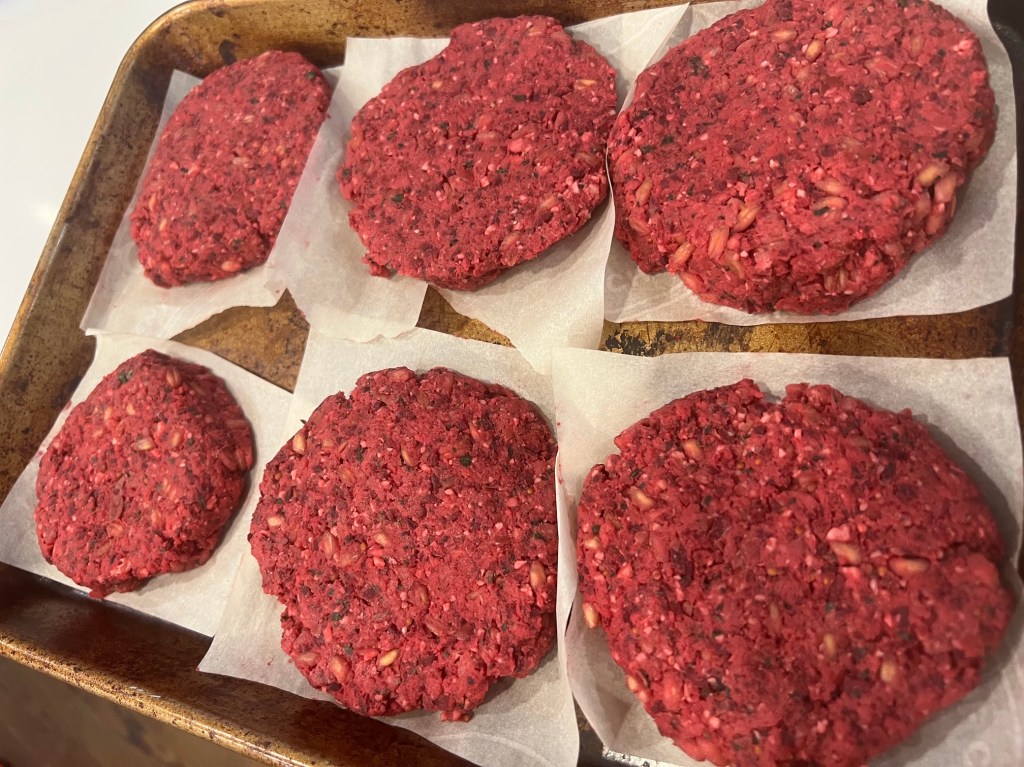
Instead of using burger buns, I used sprouted whole wheat bread to make a sandwich and I added crispy shallots, arugula, Veganaise, sambal sauce, home pickled onions, and avocado. It was delicious. For making the shallots cook them over medium heat on a lot of oil until golden, then let them dry on a paper towel.
I also made empanadillas. Which I haven’t eaten or made in probably 20+ years! I couldn’t find the pre-made dough in a couple of stores I looked, so I used a recipe from my old copy of 1080 Recetas de Cocina, which turned out ok – this book likes to use “a small glass” as a unit of measure, which, of course, depends of how big your “normal” glass is. The recipe I ended up settling on is about 350 grams of flour, 50 grams of oil, and I-have-no-idea how-many grams of water because I used one of my glasses which was probably too big as they turned sticky (and I had to readjust with flour). Need to keep iterating on this.
-
Smash burgers
This is how I make my smash burgers.
If I have time, I will make home-made buns (here’s the recipe that I translated to Spanish from Joshua Weissman).

I make balls of meat and cook them on the griddle at high heat. I use a sturdy spatula to smash them. I add freshly cracked black pepper and salt on the raw side while they are browning, then flip them, add American cheese, and finish cooking them until the cheese is melted.

For the secret sauce, I use:
- Mayonnaise, ketchup, and mustard in the same amount.
- A bit of dill pickle juice.
- Dill pickles, chopped.
- A bit of onion powder.
Then I just make them with:
- Secret sauce.
- Burger and cheese
- Chopped white onion
- Extra pickles
- Optionally, chopped iceberg lettuce.
-
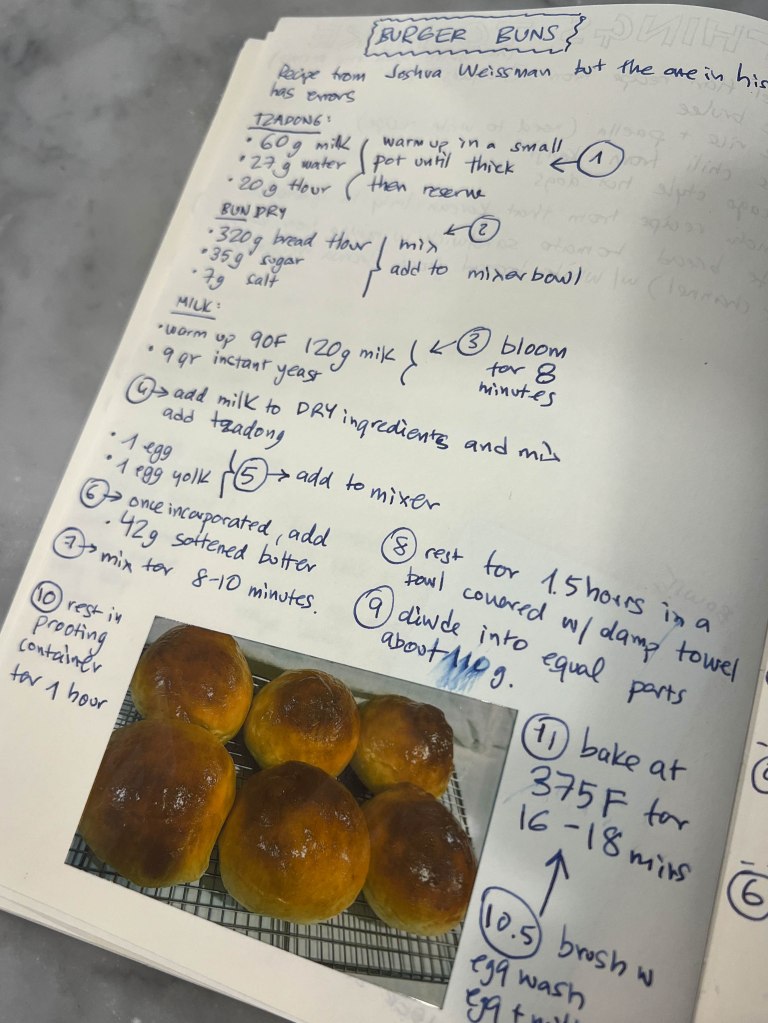
Pan de Hamburguesa
Receta original de Joshua Weissman. La version en su libro, en su website, y en su video varian un poco y las dos primeras tienen un par de errores. Las primeras dos veces use las recetas “malas” y me salieron horribles. Asi que ahora tengo la receta correcta recompilada del video en mi libro de secretos:
- Harina de pan
- Levadura instantanea en polvillos
- Leche
- Azucar
- Sal
- Agua
- Huevos
- Mantequilla
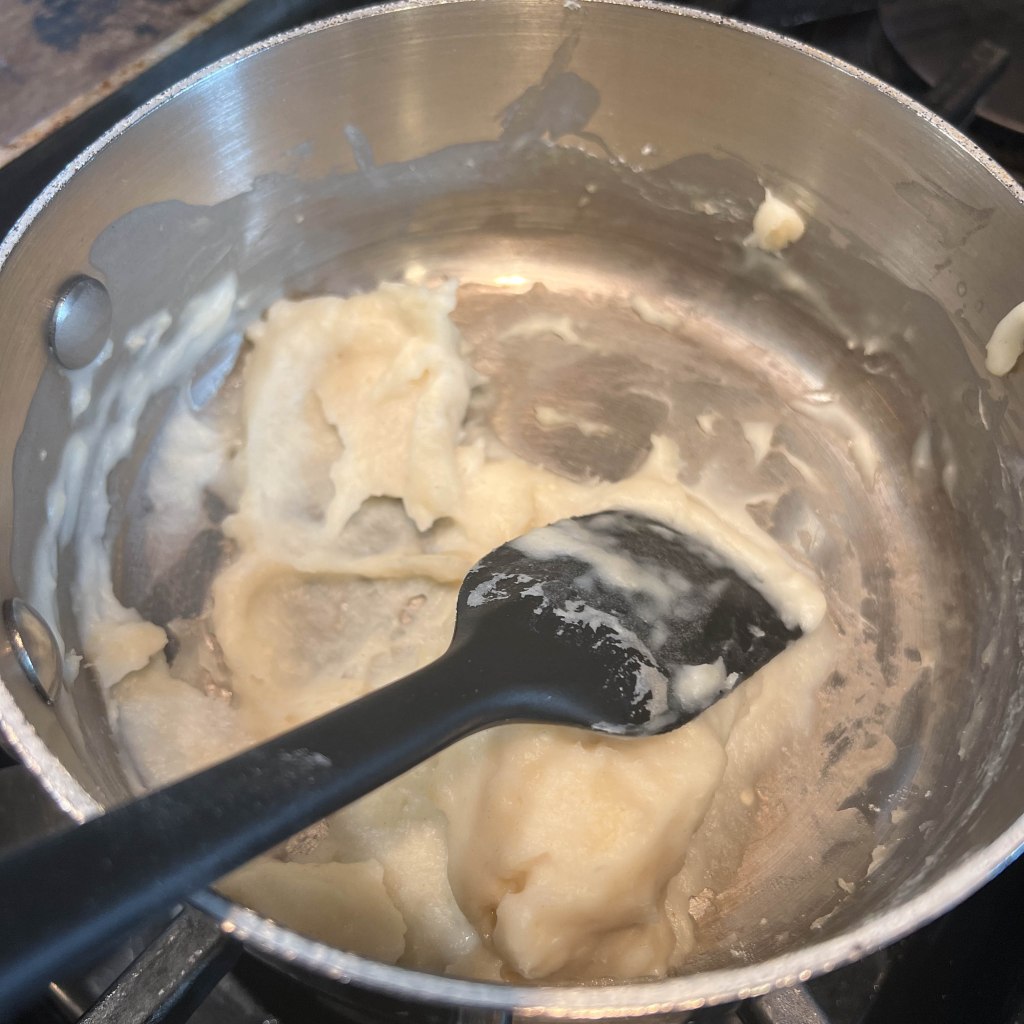
Primero, en un cacerolo pequeño se hace el tangzhong:
- 60g de leche
- 27g de agua
- 20g de harina
Se pone a fuego lento y se remueve bien hasta hacer una pasta. En cuanto espese se quita del fuego y se deja enfriar:
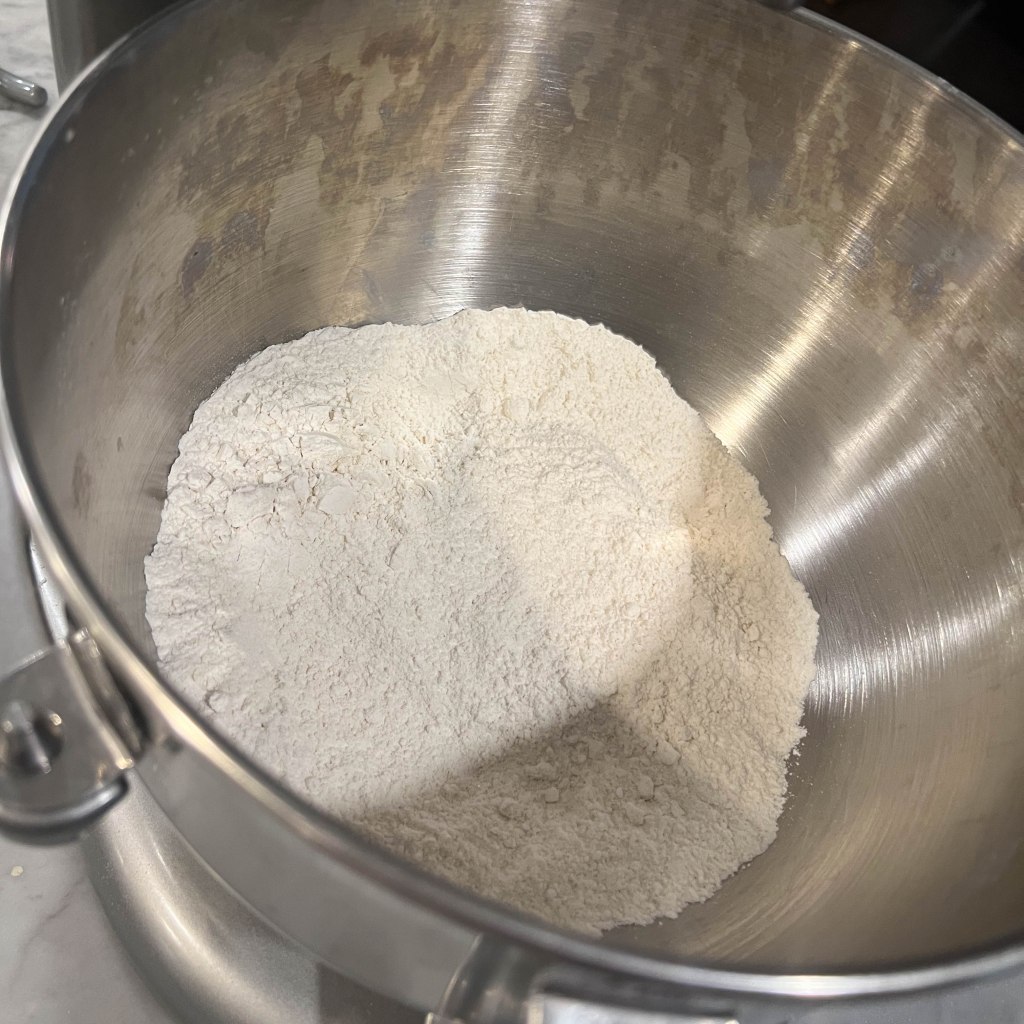
Por otro lado, en el bowl de la maquina (“stand mixer”) se echan:
- 320g de harina de pan
- 35g de azucar
- 7g de sal
Se mezcla bien con la mano y se deja ahi de momento.
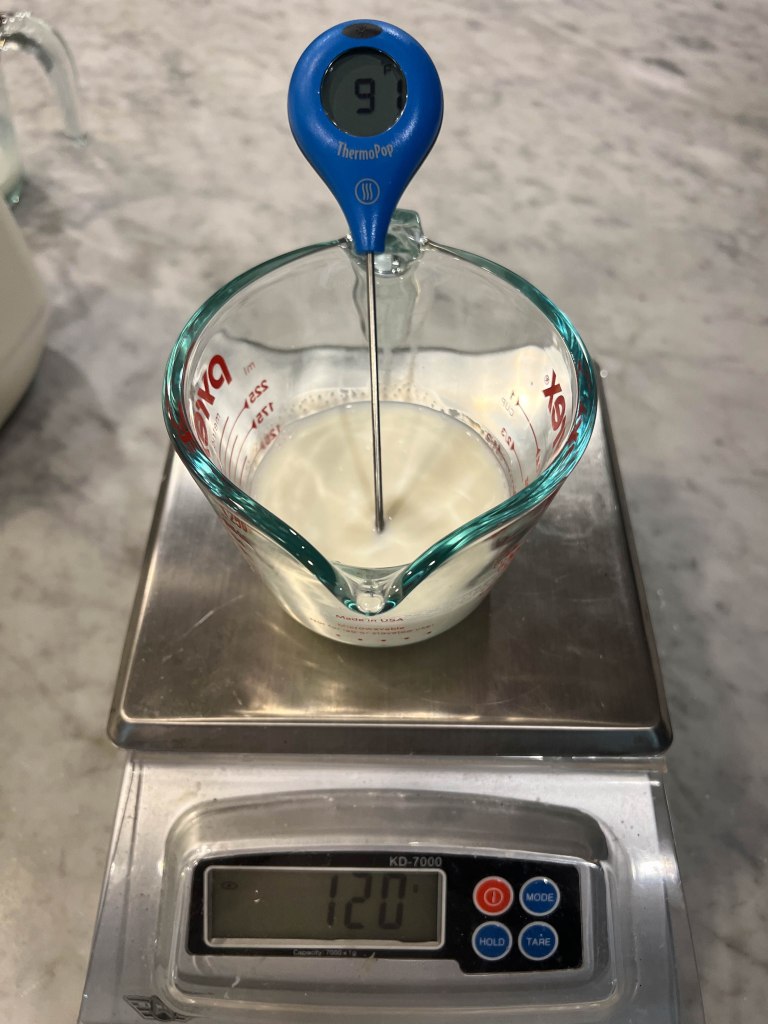
En un vaso se mezcla:
- 120g de leche, calentada a 32C (yo la caliento en el microhondas)
- 9g de levadura en polvo instantanea.
En los USA suele haber “instant yeast” y “active dry yeast”, no son lo mismo pero se pueden reemplazar usando diferentes cantidades, esta receta es para instant yeast.

Se deja 8-10 minutos.
Listos para hacer la masa. Se enciende la maquina con un gancho de amasar y se le añade el tangzhong y la leche con la levadura, y tambien se le añade:
- Un huevo y la llema de otro.
Una vez incorporado, despues de un minuto o dos, se le echa:
- 42g de mantequilla a temperatura ambiente.
Se le pone poco a poco hasta que se incorpore, y se deja todo amasando 8-10 minutos hasta que quede una bola de masa relativamente suave y no demasiado pegajosa.

Una vez amasada se pone en un bowl engrasado con un poco de aceite o mantequilla y tapado con una toalla humeda o plastico y se deja en un sitio caliente (entre 25C y 32C) una hora y media hasta que doble en volumen.
Yo lo pongo en el horno con las luces del horno encendidas, pero apagado, y he medido que me da una buena temperatura.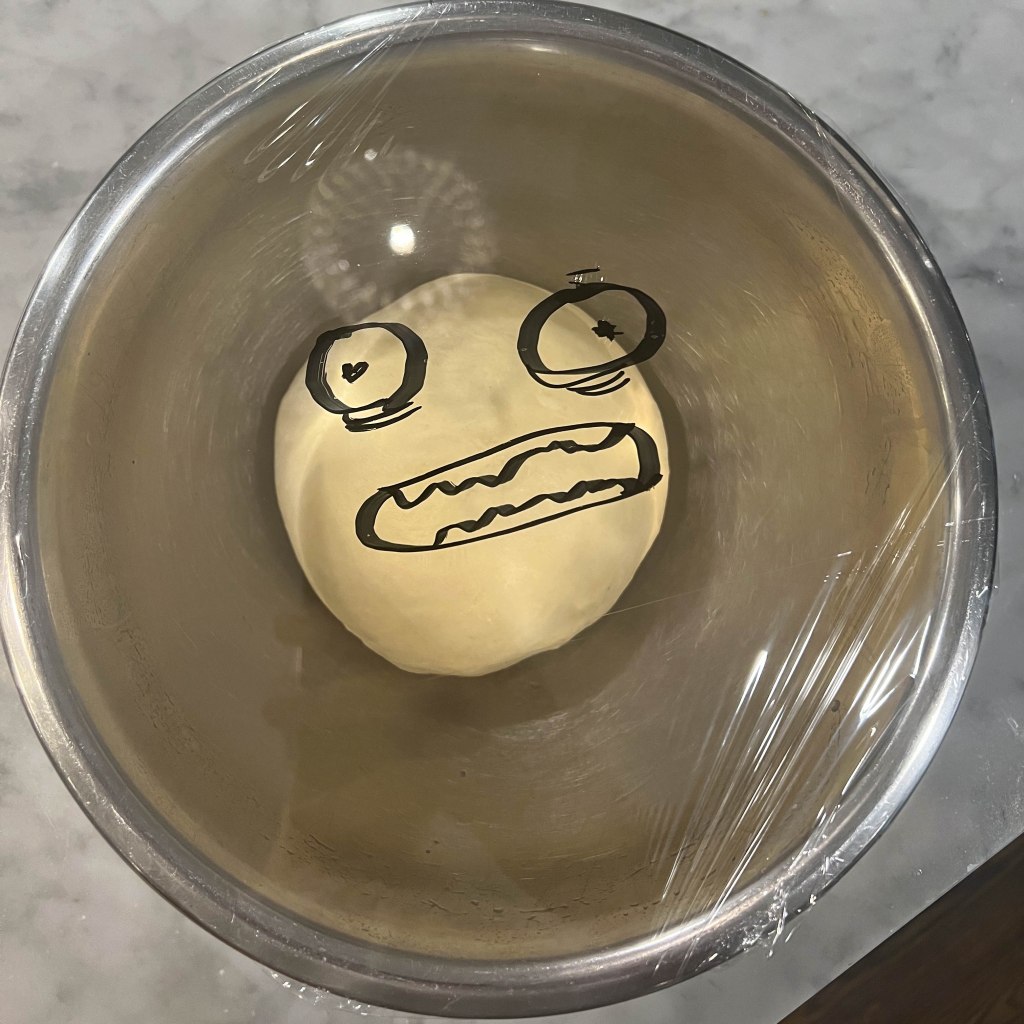
Una vez doblado en volumen se le da un par de puñetazos para desinflarlo, se pesa, y se divide su peso por 6 (deberia salir entre 108-110 gramos).
Se corta la masa en porciones de ese peso, y se forma una bola con cada porcion. La tecnica para hacer las bolas es importante, lo mejor es ver el video de Joshua para enterarse.

Una vez hechas las bolas yo las pongo en una caja de plastico que tengo para este proposito (suelo usarla para fermentar bolas de masa de pizza), pero se puede poner en una bandeja de horno tapada con otra encima (mirar el video).
Se deja fermentando una hora.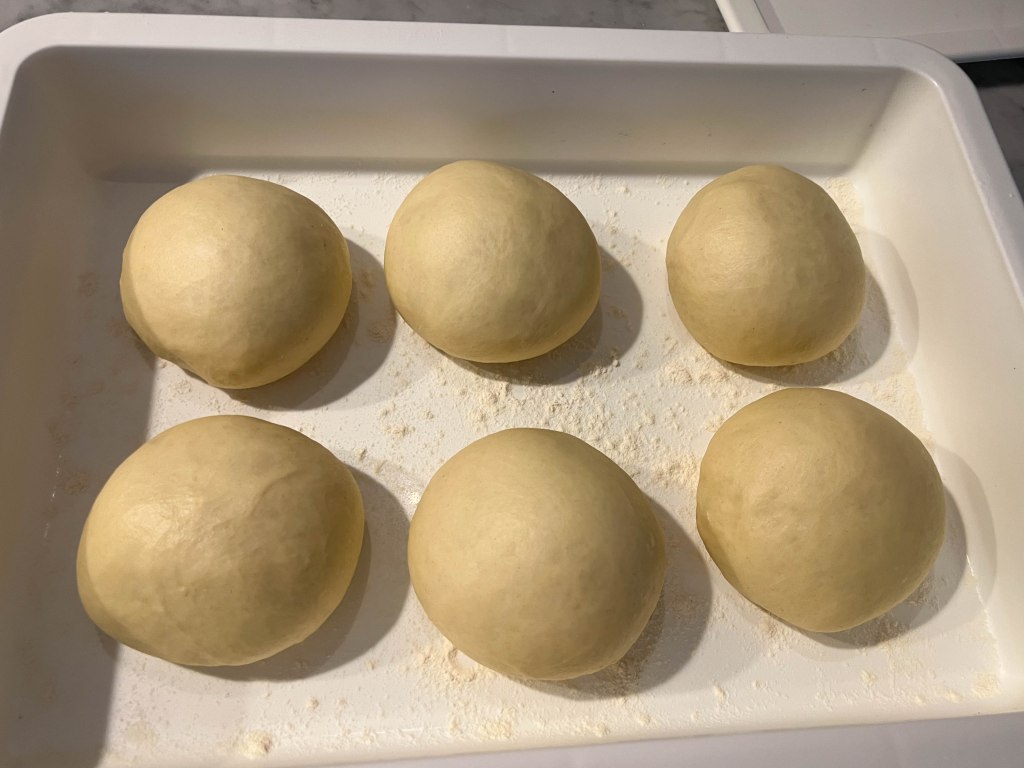
Una vez terminada la fermentacion, se mueven a una bandeja de horno con cuidado y se les pinta un huevo batido con un poco de leche por encima con una brocha. Se ponen en el horno a 190 grados durante 16 minutos. No abrir el horno hasta el final y no usar conveccion.
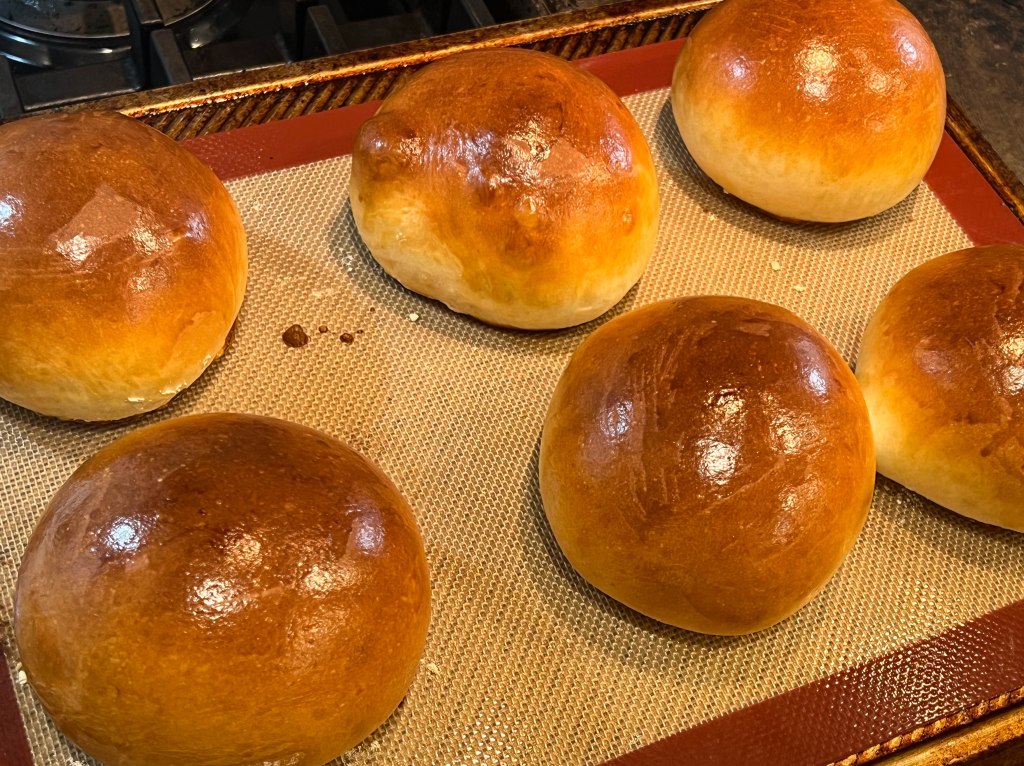
Justo al salir del horno se les pinta un poco con mantequilla encima con la brocha, opcionalmente.
En este post describo como hago mis smash burgers con estos panes.
-
Fish Stock
I’ve been making beef and chicken stock for many years, but fish stock, not so much. During the past couple of weeks, I’ve been perfecting my technique. Yesterday I made an amazing stock that was so good I ended up pouring it in a glass and drinking it plain. Here’s how I made it:
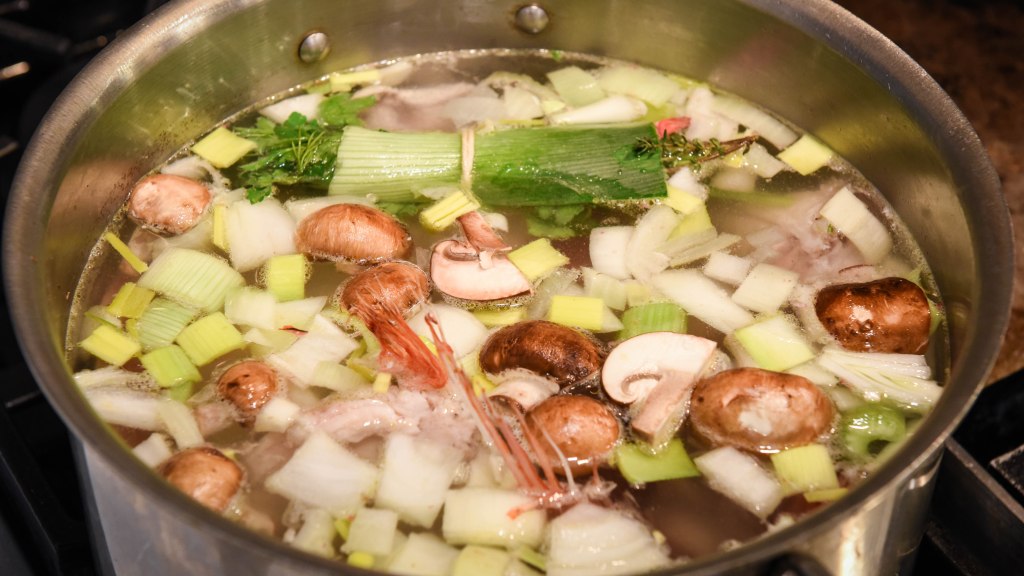
- 1 9-pound whole rockfish. I had the fishmonger gut it, filet it, and give me it with the bones and head.
- Carrots, celery, yellow onion in 1:1:2 proportions.
- A chunk of leek.
- A herb package made with parsley, dill, thyme, and a couple of bay leaves, wrapped by a single leek layer and tied with butcher’s twine.
- 4-5 brown button mushrooms.
First, I put the fish bones in cold water and brought it to a boil. As soon as it boiled, I drained the water and saved the bones. I learned this technique to remove scum and make clearer stock when I learned to make pho broth last year.
I put all the ingredients in a large pot, along with the boiled bones, and cover ed it with water. I brought it up to a boil then simmered for 3 hours.
I also had some amazing red spot prawn shells leftover which I added to the broth later and gave it an incredible flavor.
A couple of mistakes I made before:
- I used to add too many prawn shells which makes it taste less like fish and more like shrimp (duh).
- I didn’t cook it long enough. Now I taste it (after adding some salt) and keep cooking down until it’s nice and potent.
- I rarely use herbs for my chicken or beef broths, but I think for fish it brings an extra, subtle complexity that’s really nice with the more delicate fish flavor.
-
Picture Frames
I have been making frames for almost 10 years now. I recently took it to the next level thanks to this video from Michael Alm. I bought the plans for his framing jig and his spline jig and built them a couple of months ago. I’ve built a few jigs for the same in the past, but these are by far the best.
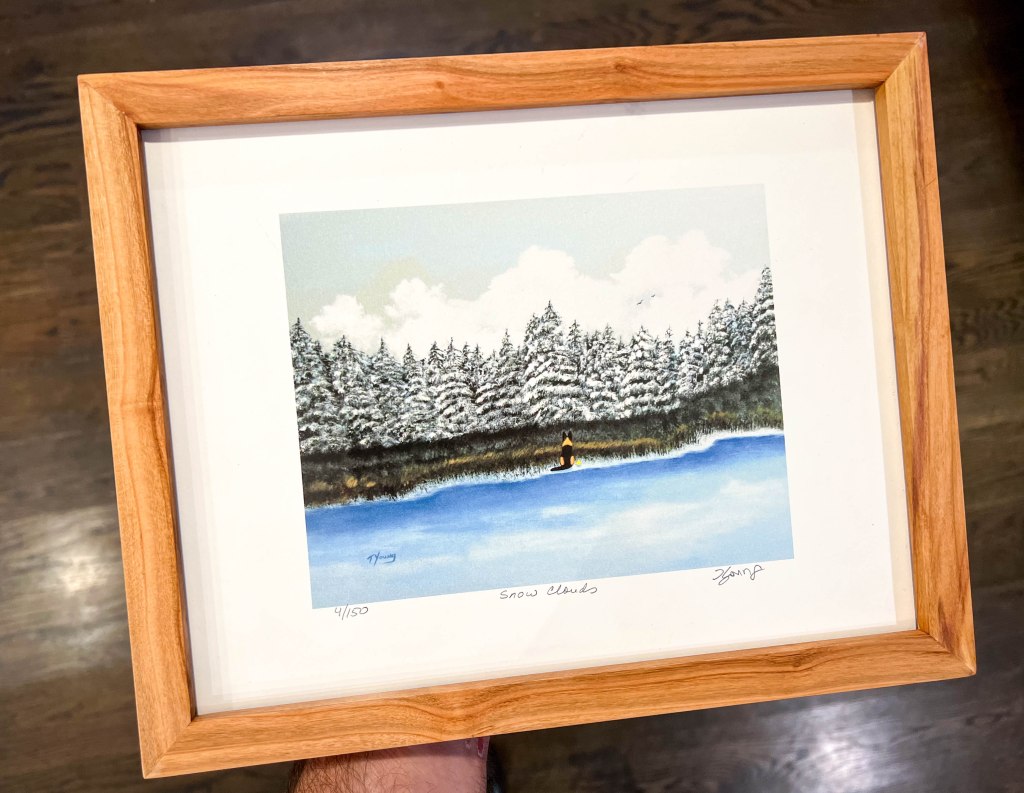
Here’s how I used his jigs and steps to build a frame for a print for my wife.
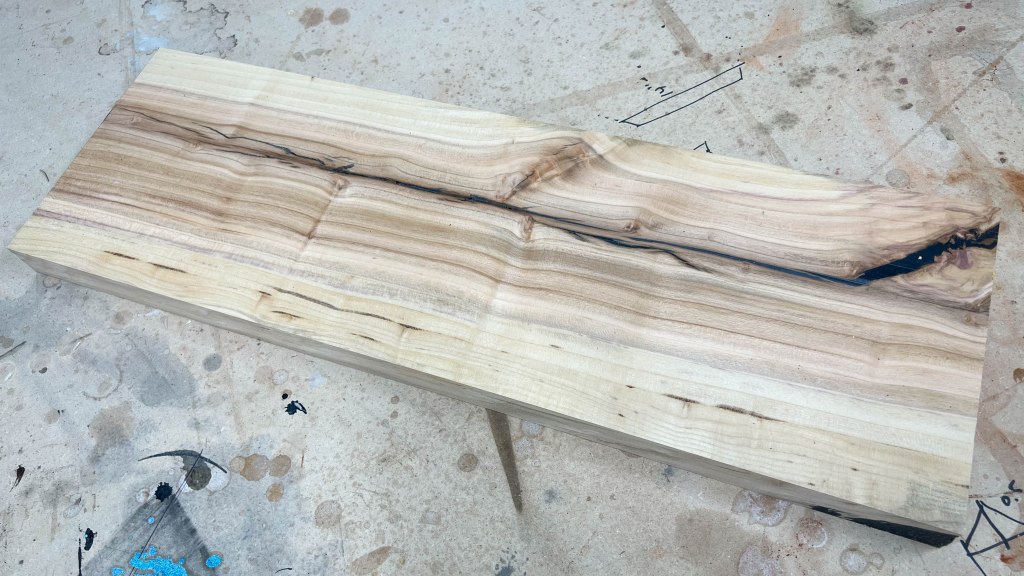
About 7 years ago, a friend cut a plum tree and gave me a piece of the trunk. This wood is beautiful with colors from yellow to red and purple, and some really nice crotch figure. I milled it, dried it for a couple of years, and made a couple of things with it, like a small box and whatnot. I still had a slab lying around, and I figured I’d make another box with it. Unfortunately, when I filled the cracks with epoxy, I had an inexplicable brain fart and poured half the amount of hardener. As a result, the epoxy in the cracks is too soft to look good. So, I decided to make a frame with it instead:
I jointed and planed all four sides, then cut the rabbet on the table saw with a square edge blade. It is 1/4 inch deep, and 1/4 inch off of the edge. The sides of the frame are about 3/4 inch wide.

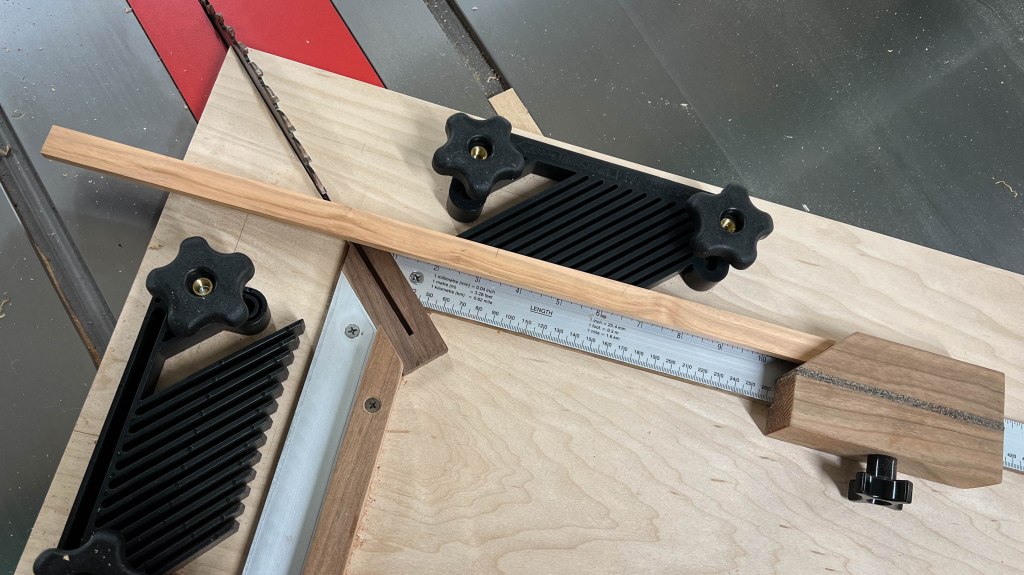
The framing jig is awesome in many ways, but my favorite feature is that it makes it super easy and repeatable to cut to the exact dimensions. The ruler and stop block on the right side let you set the cut up so that it’s the length of the space inside of the frame. In this case, the picture is 11 x 8 1/2 inches, so I cut exactly at those lengths using the ruler.
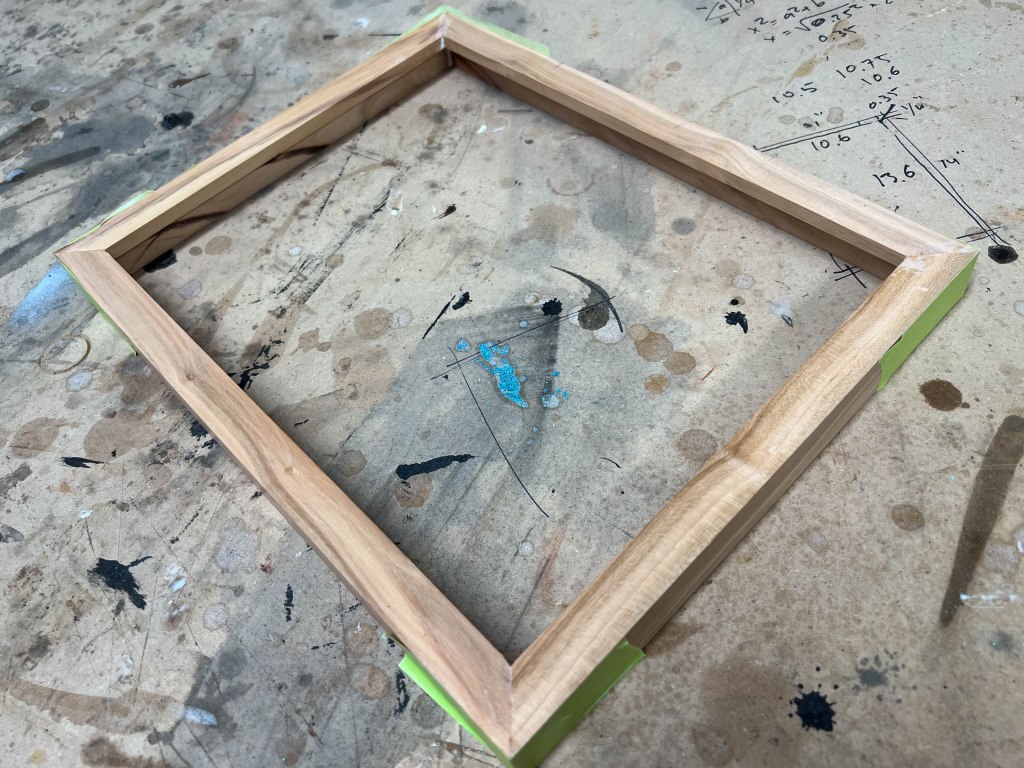
I glued up the joints and held them together with painter’s tape to dry:
To make the splines, I got this thin rip jig from Amazon, which I really like because I have never been too fond of cutting thin strips against the fence. This is a lot safer, and I wish I had gotten one of these long ago.
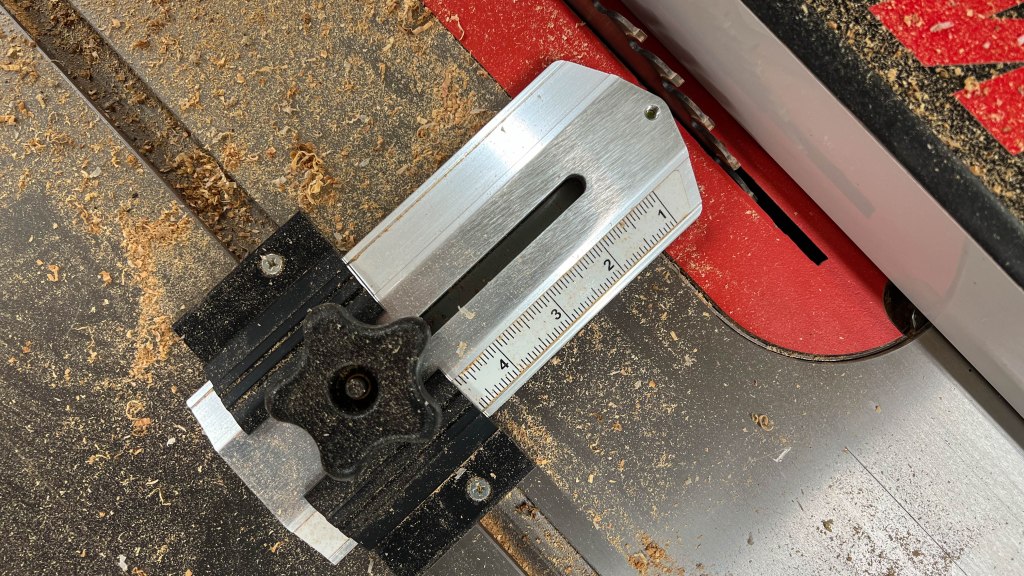
I cut the slots for the splices on the table saw:
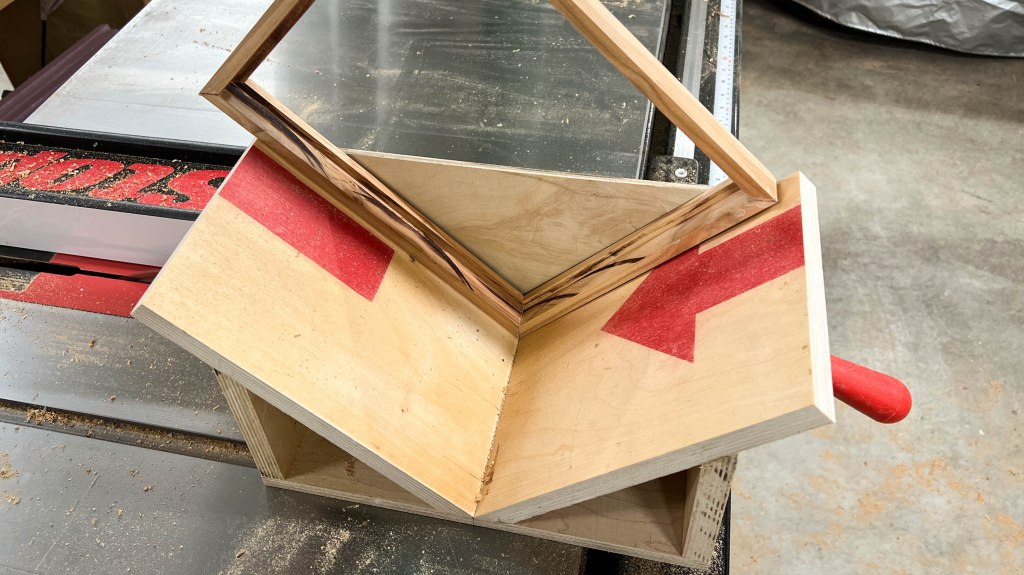
I had to sand them a bit on 100 grit sandpaper to fit perfectly.

Once dry, I cut them with my flush trim saw, then carefully finish them with the block plane, to avoid chipping the corner.

Here are all the parts put together ready to assemble. I use plexiglass and backer board I got from Amazon. I cut the plexiglass on the table saw and the backer board with an Xacto knife.
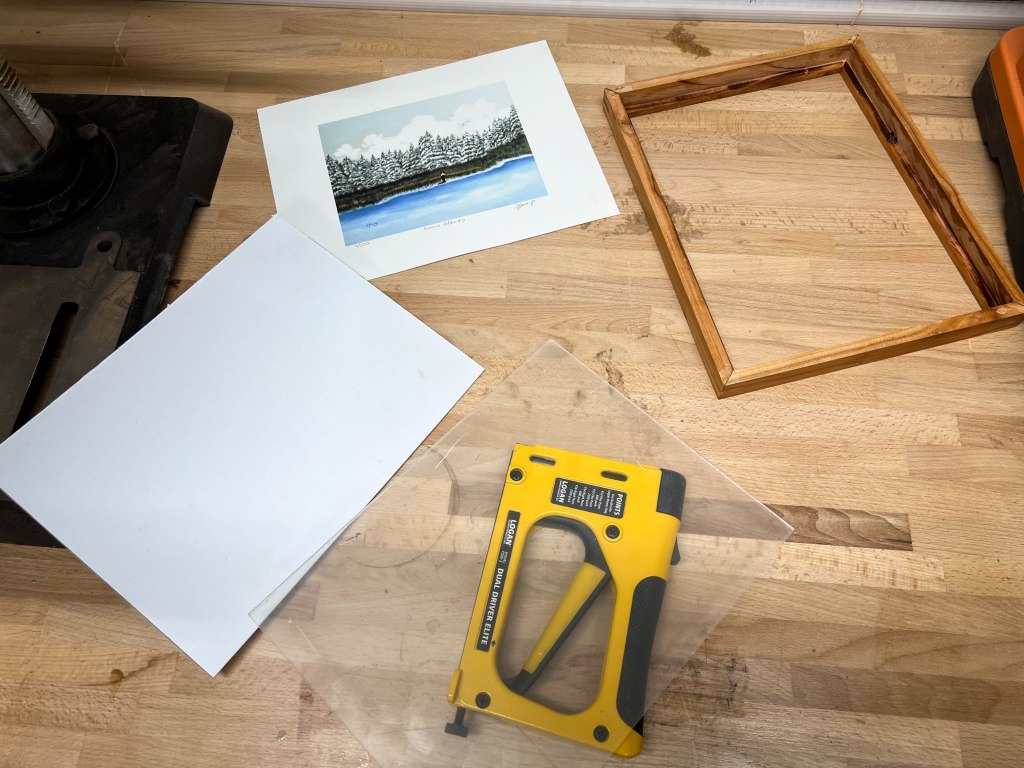
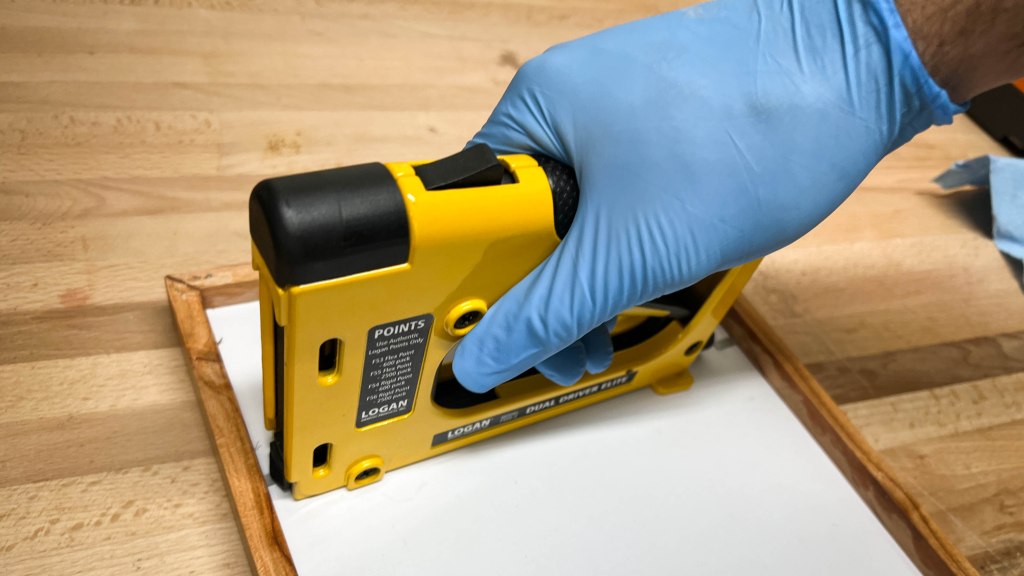
This stapler thing is something I’ve avoided buying over the years, but I finally went for it. It’s so awesome. Before I had this, I nailed small nails on the sides.
For finish, I applied a very thin coat of Tried and True varnish with a cloth, let it cure for a couple of days, and then burnished it with 00 steel wool. This finish is amazing, I particularly love it in walnut. It also smells great.
-
Spicy Peanut Sauce
Use a mix of common sense, suggestions below, and your own taste for quantities. Makes approximately a cup of sauce:
- ~3 garlic cloves minced very finely.
- About the same amount of finely minced ginger.
- ~1 tbsp of brown sugar.
- ~1 tbsp fish sauce.
- 1 cup of peanut butter.
- ~1 tsp sesame oil.
- juice from one lime
- A squirt of hot sauce, such as the Sichuan Chili Oil I made here.
- Water, enough to make the sauce creamy but not super thick.
Heat up all the ingredients in a saucepan and serve.
Block of Tofu with Spicy Peanut Sauce
So, I made this today and it was amazing.
Sautee a block of firm tofu on canola oil on both sides until brown. I cut it so it’s about an inch thick. Serve with the sauce and scallions on top. Ridiculous.
-
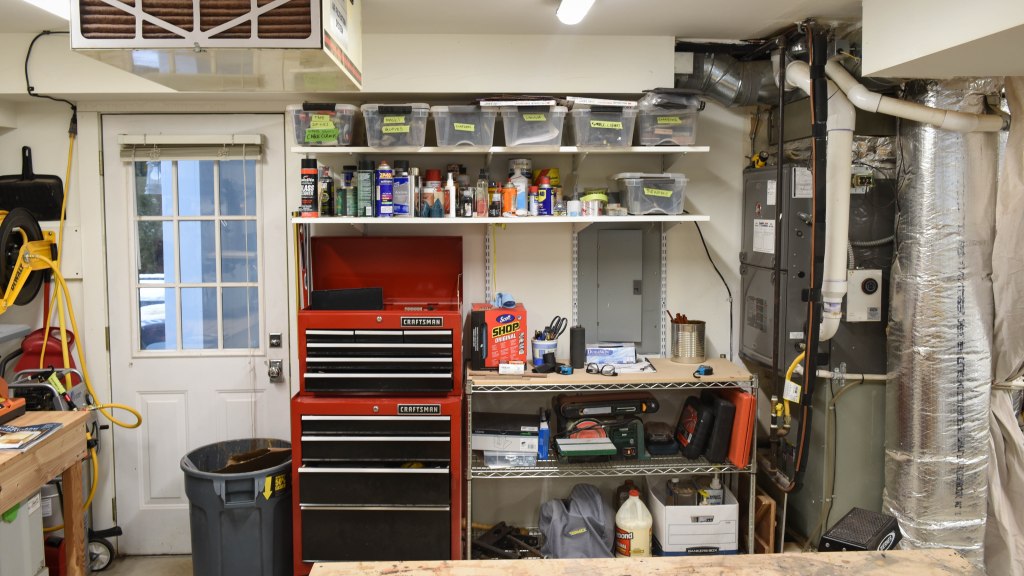
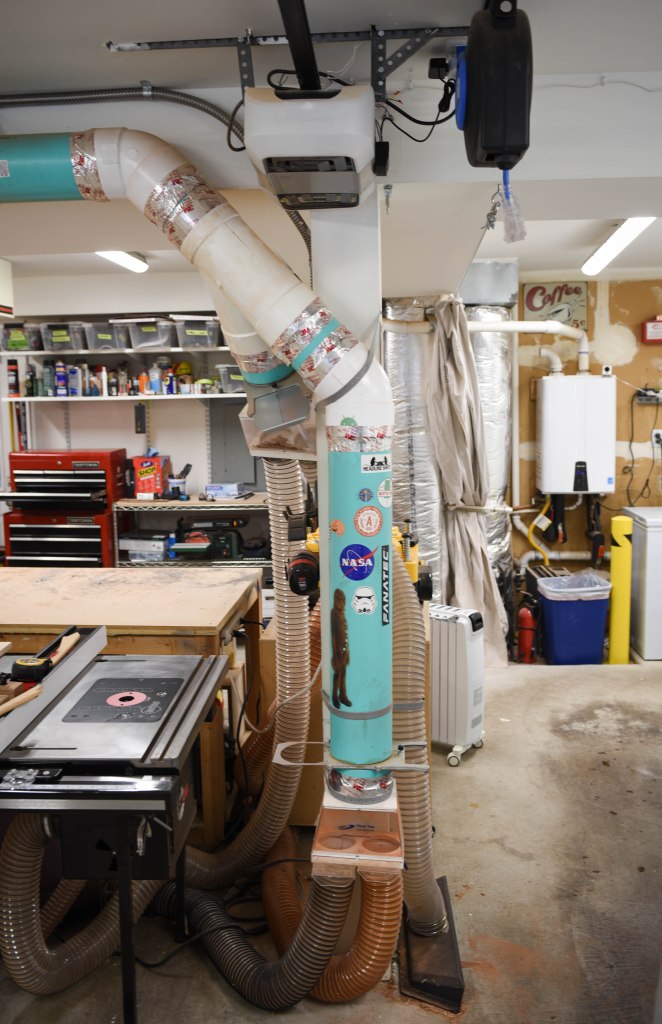
Woodshop Tour
This is my second shop in our current house. It takes half of our 2-car garage.
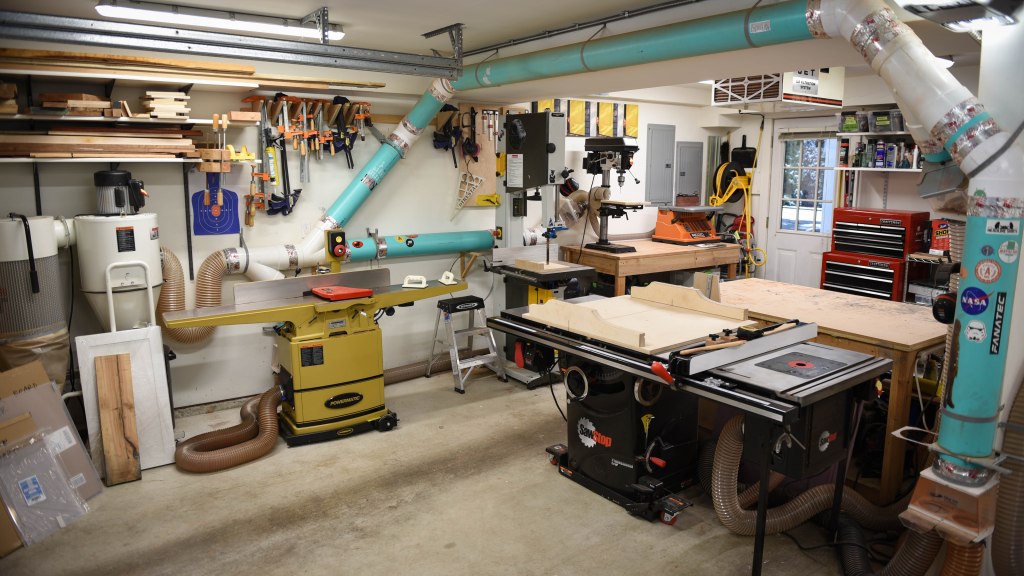
This corner of the shop is right by the garage door:
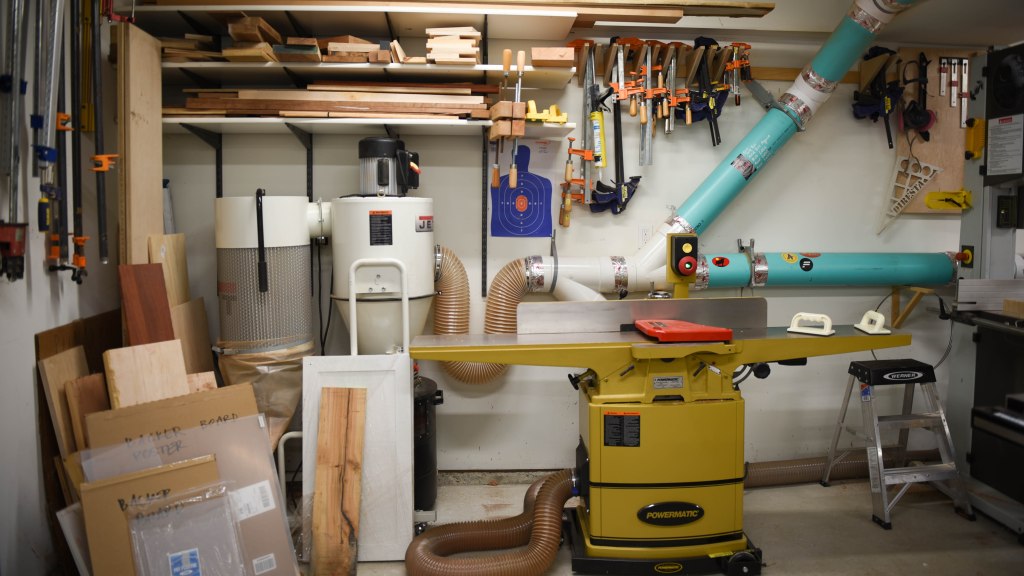
There I have my old Jet dust collector. I piped it throughout the shop using sewer pipe using this post from Jay Bates as inspiration. I learned more than I’d ever imagined I’d want to know about sewer piping specs while I did this. I am super happy with how it turned out.
I keep my extra stock on shelves I built inspired by this Wood Whisperer shop tour.
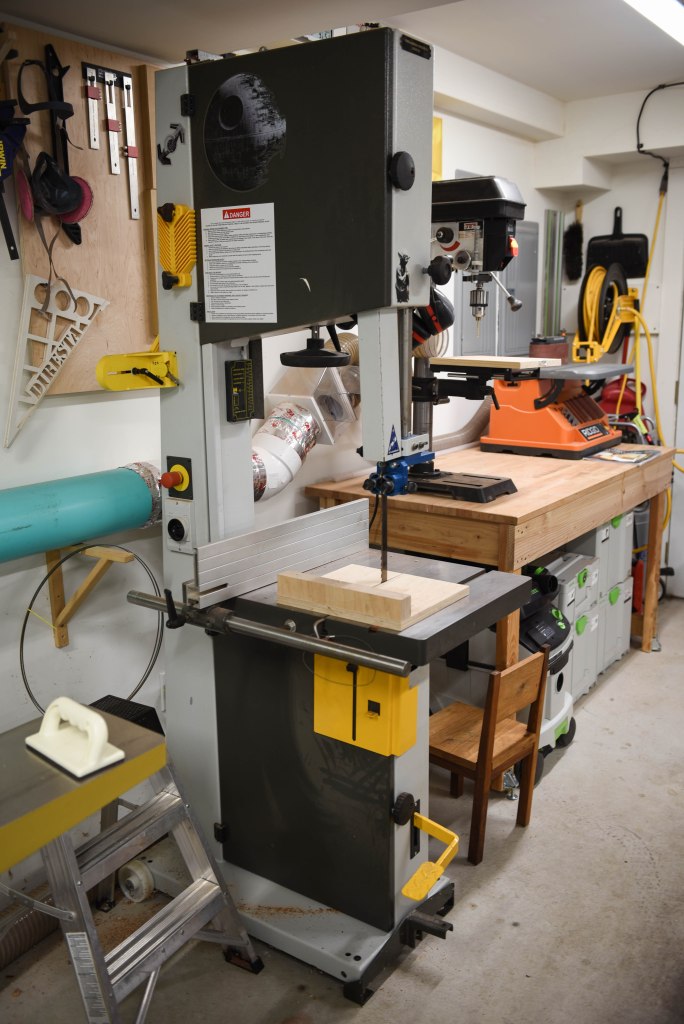
My bandsaw is a laguna LT18HD 18″. I love this machine because it’s a beast, and because it was a very touching gift from my one of my best friends for my 40th birthday.
My jointer is an 8-inch Powermatic 60HH (helical head):

It took me years to bite the bullet and get one, and I don’t know how I could live without it for so long. One thing I learned about woodworking is that if you are able to make things flat and square, you are 90% of the way there. I love this jointer, big time.
I have had my DeWalt 12″ planer for many years now, and I still love mostly everything about it except it not having a helical cutterhead. The blades which keep chipping and it’s a pain to replace them. I have a friend that installed a helical cutterhead in his, and I may do that. Or, if I can get myself to justify spending the money, may one day upgrade to a Powermatic.

I have a Jet bench drill press which I upgraded to from a smaller one a couple of years ago:
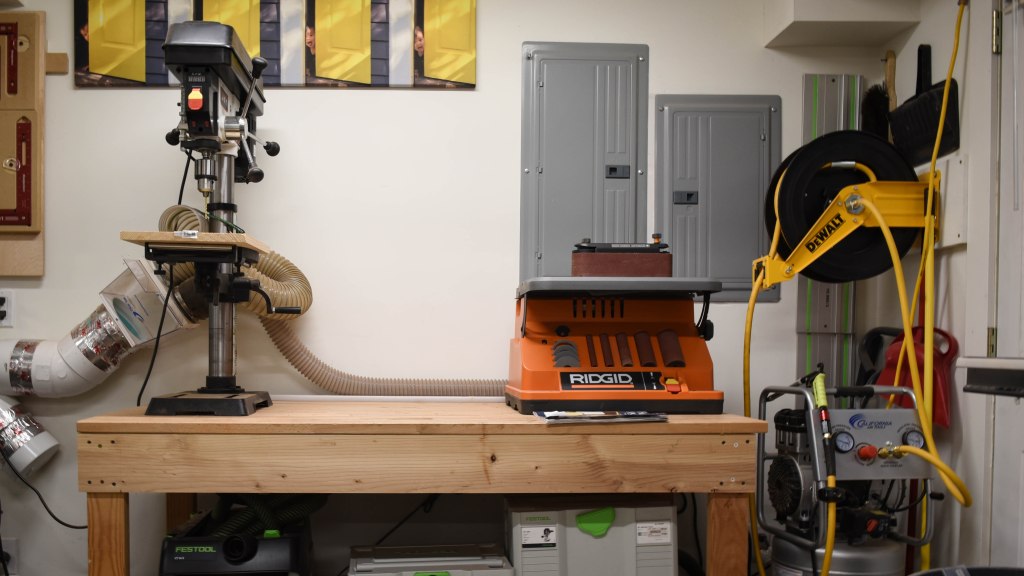
One thing I love is my California Tools air compressor and the hose wheel I installed on the wall. This compressor is so quiet it’s hard to believe. I use it mainly for cleaning the dust in the shop, for my nail guns, and every now and then to pump air into my cars’ tires.

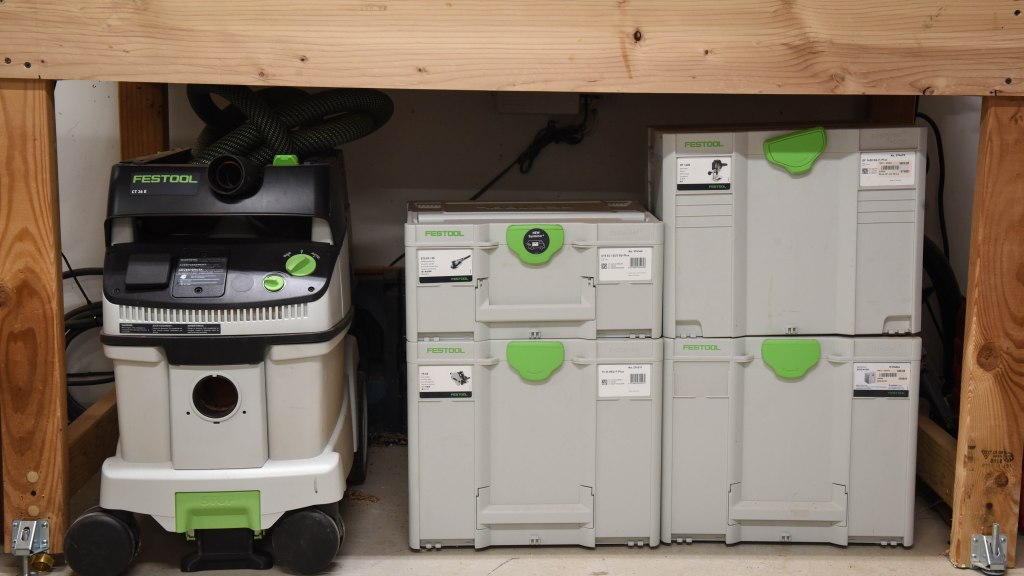
My Festools are another splurge. I have the tracksaw, the plunger router, a small sander, and the vacuum which is super nice because it can connect to all the tools and avoids a huge mess:
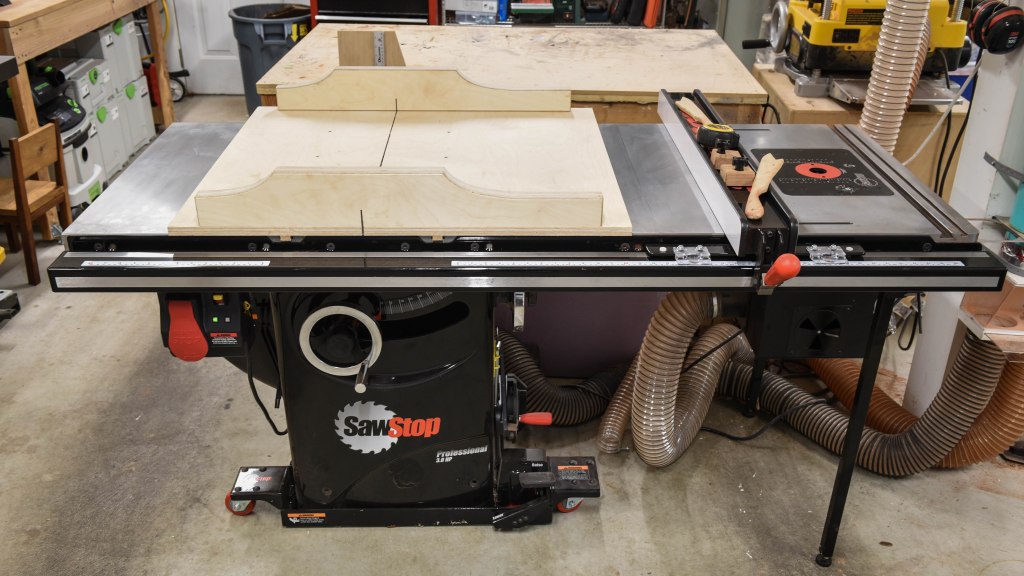
Speaking of splurges, my SawStop was another Xmas gift. I also installed the router table on the side so the entire top is cast iron. The sled on top is one I built from a Wood Whisperer video:
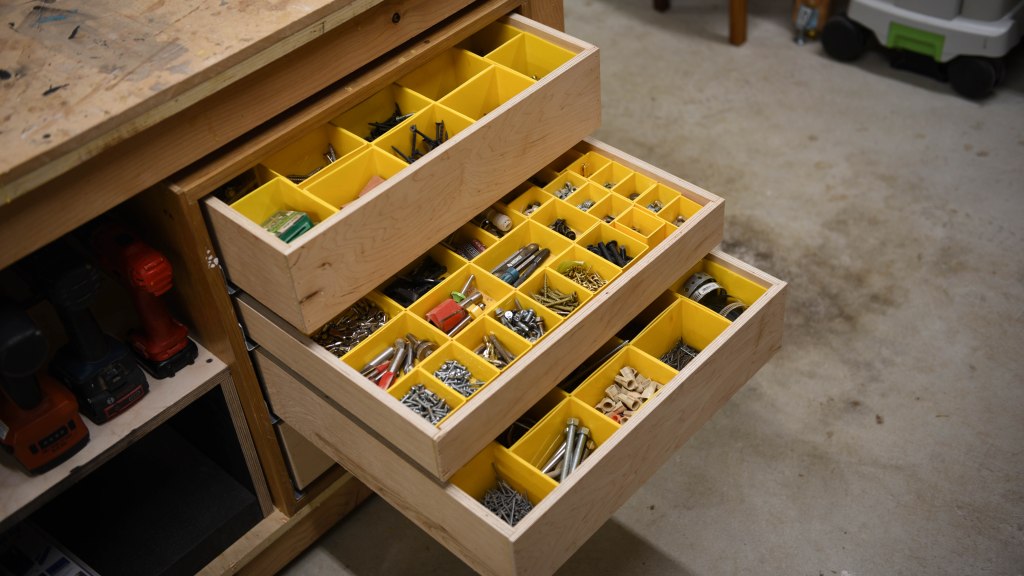
This cabinet is my latest iteration for small part organization. My previous version used Stanley cases, and it was a pain because I had to pull them out, open them, get the part, close them, put them back in, and I’d always end up with open cases all over the shop. So I took the yellow containers and built a cabinet, so they fit like an exact grid. I used some spare wood and spare drawer runners I savaged from built-in furniture I got rid of in the new house.
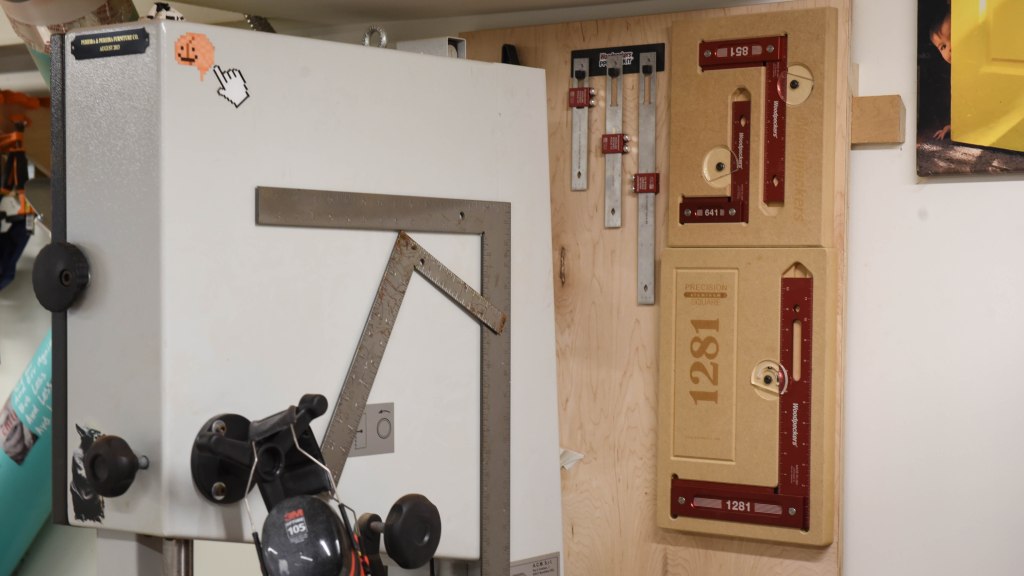
I keep my squars on the wall. A year ago I bought the Woodpecker squares and they are just so beautiful. I keep the other ones attached with magnets to the bandsaw:
Here’s the back of the shop:
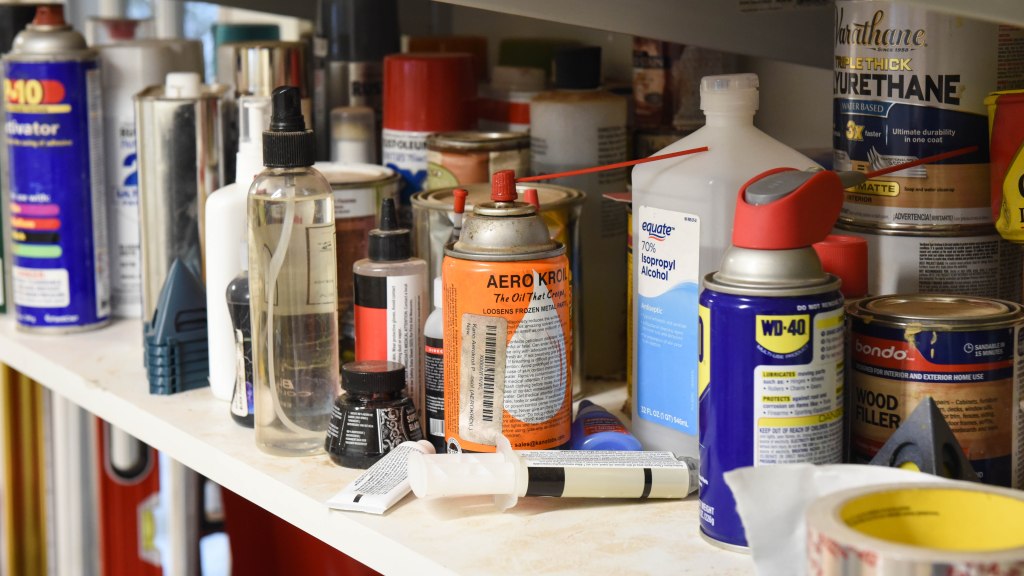
I keep my paints, glues, and finishes in a shelf. One day I’ll organize this inside of a metal cabinet (for the flammable stuff). A couple of tips: that Aero Kroil penetrating oil is awesome. I also keep camellia oil for my hand tools. WD-40 I mostly use for removing rust from cast iron surfaces (scrub with 00 steel wool). Isopropyl alcohol is handy to clean up epoxy (my father taught me this a few years ago):
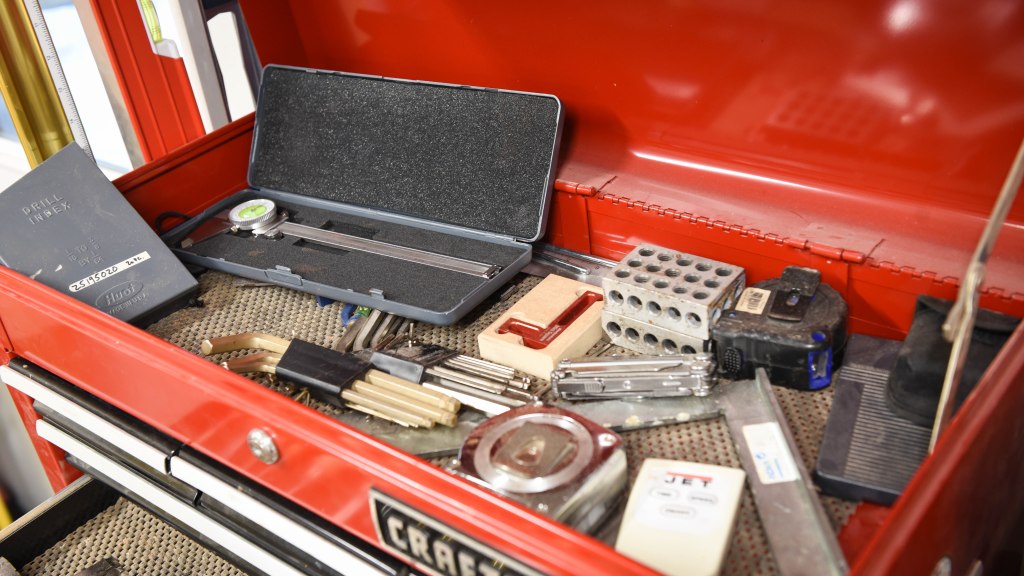
In the top compartment of my toolbox I keep some of my favorite tools. The 123 blocks are the one tool you didn’t know you needed until you got it: I use them all the time as weights, to square things up, as stop blocks, you name it. I also have in there my 30 year-old calculator, an amazing set of wood drill bits, and my caliper which uses inches (unlike most calipers) and no batteries. Here’s a great video on woodworking calipers. I have a Woodpecker tiny square, and one of my favorite things: a square my brother gave me which is super well made. I also love my Bondhus hex wrenches:
These are some of my chisels:

On the left I keep a couple of my grandpa’s many-decades-old chisels which I restored. I learned to cut dovetails by watching Matt Cremona’s videos (here’s his video on dovetail chisels), and I got the same dovetail chisels he uses and they are amazing. On the right side I have a set of Lie Nielsen bevel edge chisels.
These are some of my hand tools:

On the right is an old Stanley #4 I restored a few years ago. I have a low angle Lie Nielsen plane, some marking tools, bowtie and dovetail jigs, and a Stanley #80 I bought off of Ebay that is awesome for cleaning up glue-ups.
Here’s the area below my assembly/worktable:
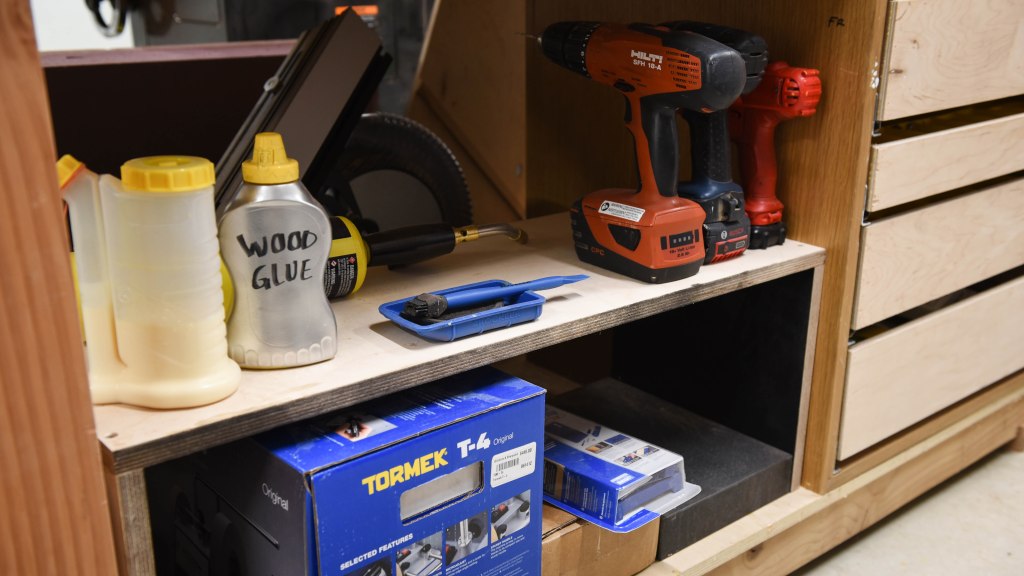
I use a recycled mustard container for wood glue. I got a Tormek for sharpening my hand tools but in retrospect I think I regret it. It is still not as foolproof as I wished. I’ll probably do another post about my tool sharpening journey another time. My Hilti drill is also one of my favorite tools: so well made. I keep my chop saw behind: I don’t use it that much, I tend to do my cross cuts on the table saw with my sled.
Here’s a view of the duct that goes to the table saw, the router, the planer, and a floor dust-sucker which I broom stuff into and it’s the best. Another thing I love having is the power cable hanging from the ceiling which I can pull to anywhere in the shop and quite far outside too:
-
What I Cooked This Weekend #1
Albondigas
I made albondigas (Spanish stewed meatballs) and served them as a hamburger, using homemade burger buns.
Kimchi
I also made a batch of kimchi, using Maangchi’s recipe (video). I used gochugaru that a friend brought me from South Korea. I used one and a half cups, and it turned out a bit too spicy. Eating fresh kimchi with fresh cooked rice is amazing.
Seafood Paella
On Monday I made a seafood paella for dinner, using this technique from Alex (video). It turned out incredible. For the broth, I bought a whole rockfish and two soles, and used their bones and heads, along with some shrimp. Next time I’ll use less shrimp. I also used button mushrooms in the broth which I usually don’t do but I think will in the future as it gave it a nice umami flavor.
For me, paella is about the rice. I think the key is to make a great stock, cook the rice perfectly and get some nice caramelization, and let it be the star. I like paellas with few toppings.
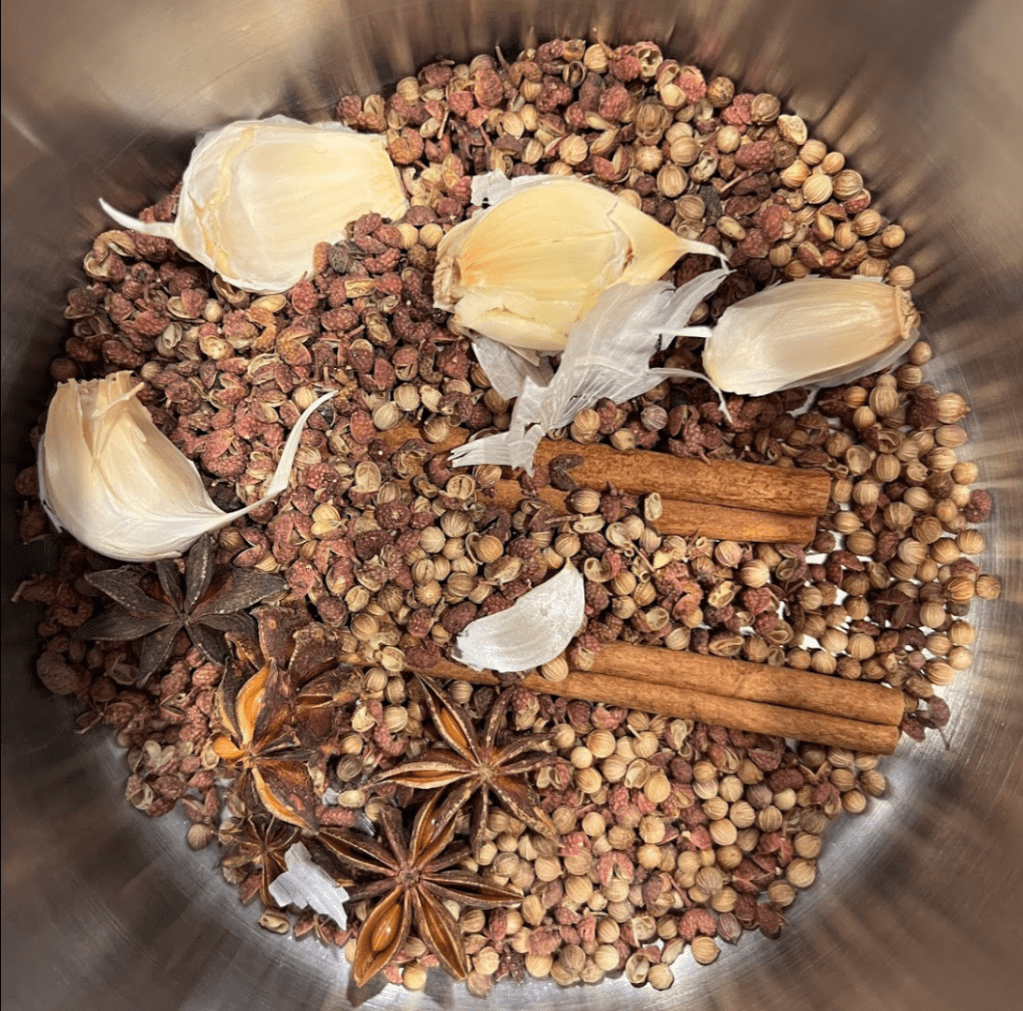
Sichuan Chili Oil
I used this Joshua Weissman recipe for chili oil. The house smelled incredible.
-
Albondigas
Spanish meatballs. This is one of the most delicious Spanish dishes I know. My recipe is a variation mixing parts from my sister’s mother-in-law recipe, and parts from my father’s.
For the meatballs:
- 500g of ground beef
- 500g of ground pork
- 3 garlic cloves, minced
- parsley, chopped very fine, about half a cup
- panko, about a cup
- 2 eggs
Mix everything in a bowl. Make the balls, coat them with flour, then brown them in a pan with oil. Set them aside.
For the sauce:
- Half an onion
- 4 garlic cloves
- 3 bay leaves
- white wine
- a bit of flour
- Optionally, a cube or half a cube of beef bouillon
Sautee the onions and garlic in olive oil with a bit of salt until soft. Stir in the flour. Then add the bay leaves, crank up the heat and add the white wine, about 3/4 cup.
Add the balls to the pot with the sauce, then cover with water. Add the bouillon, cook for 30-45 minutes.
The Best Hamburger You’ve Never Heard About
Last weekend we cooked some meatballs and my friend Brad suggested we turn them into hamburgers. So, I baked a batch of Joshua Weissman’s burger buns and then stuffed a couple of albondigas inside with a generous serving of sauce on the bread. These turned out to be one the best things I’ve ever eaten in my life!
-
Subscribe
Subscribed
Already have a WordPress.com account? Log in now.
